2026 Top Ways to Fix Wall Holes Without Professional Help

Time:2026-10-03 Author:Madeline
0%

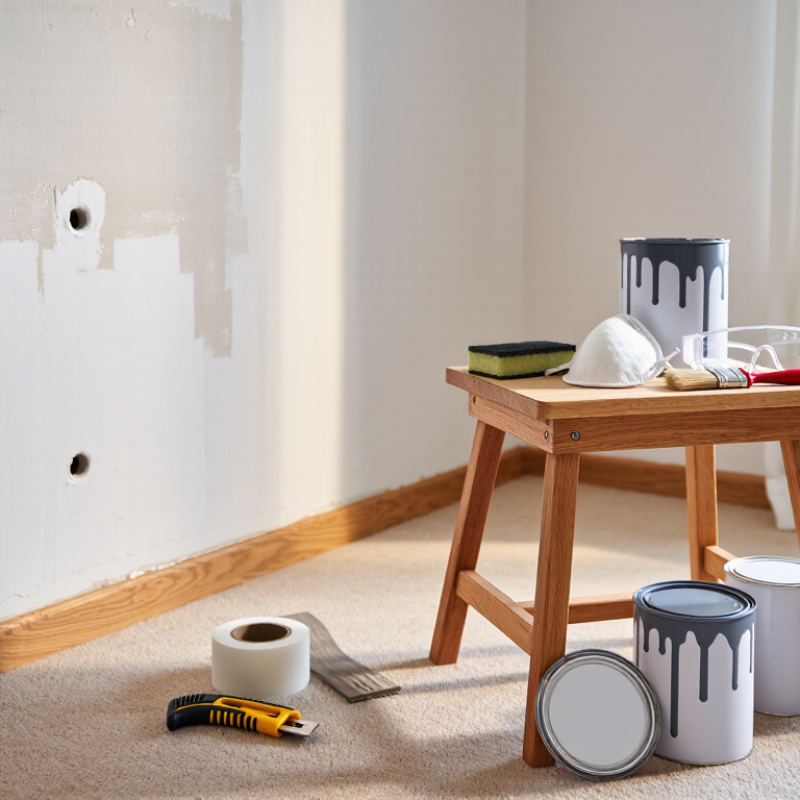
Small wall holes can make a clean room look neglected. Fortunately, many repairs need patience more than professional equipment. This guide explains how to fix wall holes without professional help using practical, low-cost methods for drywall, plaster, and painted surfaces. You will learn how to assess the damage, choose suitable materials, and create a smoother finish. Common tools include a utility knife, sanding sponge, putty knife, patching compound, primer, and matching paint. Keep them ready.

The repair method depends on the hole’s size and location. A tiny nail hole may need only lightweight filler. A larger opening might require mesh tape, a backing piece, or a drywall patch. Always check for pipes and electrical wiring before cutting deeper into a wall. Safety glasses and a dust mask also make sense, especially during sanding. Experienced decorators know that preparation often matters more than the final coat of paint. Clean edges, thin compound layers, and enough drying time usually produce better results. Do not rush this part.

Still, a home repair may not look perfect on the first attempt. Uneven texture, slightly different paint, or visible sanding marks can happen. That is normal, but it deserves correction rather than concealment. Stop and inspect the surface under natural light. If the wall feels soft, damp, or unusually damaged, professional advice is safer. This 2026 guide focuses on reliable techniques, honest limitations, and realistic results for homeowners who want a confident starting point.
2026 Top Ways to Fix Wall Holes Without Professional Help

Assess the Wall Hole and Select the Right Repair Method

Before repairing a wall hole, inspect its size, depth, location, and cause. Measure it with a ruler, not your estimate. A small nail hole may need only lightweight filler. A hole wider than two inches usually requires a backing piece or repair patch. Different walls need different methods. Drywall has a hollow core, while plaster feels harder and may crumble around the edges.

Look for moisture stains, soft areas, mold-like odors, or fresh cracking. These signs may indicate a deeper problem. Check whether electrical cables or plumbing could run behind the damaged area. Turn off power before working near outlets. Stop if you feel unsure. A neat surface is not worth a hidden hazard. Clean loose paper and dust, but avoid enlarging the hole unnecessarily. My first repair was rushed, and the raised patch remained visible after painting.

Tips: Use a flashlight from the side to reveal dents and ridges. Press the surrounding wall gently for movement. Apply thin layers instead of one thick coat. Let each layer dry fully. Sand lightly with fine-grit paper, then wipe away dust. Match the wall texture before applying paint. Keep the repair slightly proud of the surface, then smooth it carefully. Small repairs reward patience. A quick fix can still need a second attempt.

Gather Materials and Prepare the Damaged Wall

Gather Materials and Prepare the Damaged Wall

Before repairing a wall hole, inspect its size, depth, and edges. Small nail holes need lightweight compound, while larger damage may require mesh, backing, or a drywall patch. Gather a utility knife, sanding sponge, putty knife, measuring tape, clean cloth, primer, and matching paint. Keep everything within reach.

Protect the floor with a drop cloth. Move nearby furniture away from the work area. The U.S. Environmental Protection Agency reports that indoor pollutant levels can be two to five times higher than outdoor levels. Dust control matters. Open a window when practical, but avoid spreading dust through strong airflow. Wear eye protection and a properly fitted dust mask during sanding.

Cut away loose paper and crumbly gypsum until the opening has firm edges. Do not enlarge the hole unnecessarily. I have sometimes removed too much material, creating extra work. That mistake is easy to avoid. Check for plumbing or electrical components before cutting deeper. A moisture meter can help when the wall feels soft or stained. The U.S. Department of Energy identifies moisture control as a key part of durable home repairs.

Wipe the surface with a slightly damp cloth, then let it dry completely. Dust left behind can weaken adhesion. Prepare only the compound amount needed for one layer. The Gypsum Association recommends clean, dry surfaces for proper finishing work. Read the product safety instructions, even for familiar materials. Small repairs still deserve careful preparation.

Patch Small Nail and Screw Holes Step by Step

2026 Top Ways to Fix Wall Holes Without Professional Help

Patch Small Nail and Screw Holes Step by Step

Small wall holes are common after moving pictures, shelves, or curtain hardware. Harvard’s Joint Center for Housing Studies reported about $420 billion in U.S. homeowner improvement and maintenance spending in 2021. That figure reflects a large repair market, but many minor patches still need careful hands, not expensive equipment.

Remove the nail or screw gently. Brush away loose gypsum and dust. Do not widen the hole unnecessarily. Press lightweight joint compound into the opening with a small putty knife. Keep the surface slightly proud of the wall. It may shrink while drying. Wait until fully dry, then sand with fine-grit paper. Use a damp cloth afterward to remove powder.

For deeper screw holes, apply two thin coats instead of one thick layer. This reduces cracking and visible depressions. The Gypsum Association’s finishing guidance supports clean, dry surfaces and controlled compound application. Paint only after the patch feels smooth and firm. Match the existing sheen, not just the color. Gloss differences can expose careful work.

I sometimes sand too soon. That creates a soft, messy edge. Patience matters here. Stop if the wall feels damp, crumbles widely, or may conceal wiring. A small patch is manageable; hidden damage is not. Houzz’s 2024 U.S. Houzz and Home Study also recorded substantial homeowner renovation activity, reminding us that repeated small repairs can influence a room’s finished appearance.

Repair Medium and Large Holes with Wall Support

Medium and large wall holes need more than filler. They need a firm support behind the damaged drywall. I have repaired these openings by creating a small internal frame with timber strips or plywood. This prevents the patch from flexing and cracking later. Before cutting, check for hidden cables and pipes. Turn off nearby power if wiring may be involved.

Cut away loose paper and crumbly gypsum until the edges are clean. Make the opening square or rectangular. It feels less natural, but straight edges make fitting easier. Slide two backing strips behind the hole, then hold them tightly against the drywall. Drive screws through the surrounding wall into the strips. Do not overtighten them. The surface should stay flat.

Cut a drywall patch that fits with a narrow, even gap. Secure it to the backing support, then cover the joints with mesh tape or paper tape. Apply joint compound in thin layers, allowing each layer to dry fully. Large repairs often need three coats. Sand gently between coats. I once rushed this stage and exposed the tape under paint. That mistake taught me to use side lighting before the final coat. Prime the repair before painting, because fresh compound absorbs paint differently from the surrounding wall. If the wall moves, feels damp, or may be structural, pause and seek qualified help.

2026 Top Ways to Fix Wall Holes Without Professional Help - Repair Medium and Large Holes with Wall Support
Repair Method Suitable Hole Size Best Wall Type Required Support Core Materials Estimated Working Time Skill Level Key Steps Important Limitations
Lightweight Spackling Up to 12 mm Drywall, plaster, and painted interior walls None for shallow holes Lightweight spackling, putty knife, fine sandpaper 15–30 minutes, plus drying time Easy Remove loose edges, press filler into the hole, level the surface, allow it to dry, then sand and paint. Not suitable for deep holes or areas exposed to repeated impact.
Joint Compound with Paper Tape 12–50 mm cracks or shallow openings Drywall and gypsum board Paper tape bridges the damaged surface Setting-type or premixed joint compound, paper tape, taping knife 30–90 minutes, excluding drying time Easy to Moderate Clean the opening, apply a thin compound layer, embed paper tape, cover with two or more thin coats, sand, and prime. Thin coats reduce shrinkage and visible ridges; thick applications may crack while drying.
Self-Adhesive Mesh Patch 25–100 mm Drywall and gypsum board Metal or fiberglass mesh patch Mesh patch, joint compound, utility knife, sanding block 45–120 minutes, excluding drying time Moderate Trim loose drywall, center the mesh patch over the hole, cover it with several thin compound layers, feather the edges, sand, and paint. Large patches may need additional backing to prevent flexing and future cracks.
Wood Backing Strip and Drywall Insert 100–300 mm Drywall and gypsum board Wood strips screwed behind the opening Matching drywall, timber strips, drywall screws, joint tape, compound 2–4 hours, excluding drying time Moderate Square the opening, insert and screw backing strips behind the drywall, fit a matching panel, tape the seams, apply compound, sand, prime, and paint. Check for pipes and electrical cables before cutting or inserting screws.
Drywall Patch with Cleats 150–400 mm Drywall with accessible surrounding surface Timber or metal cleats fixed inside the wall opening Drywall offcut, cleats, screws, joint tape, joint compound 2–5 hours, excluding drying time Moderate Cut a clean rectangular opening, secure cleats behind all sides, attach the drywall insert, tape the joints, apply multiple coats, sand, and finish. The insert should be slightly smaller than the opening to leave room for compound and tape.
Plywood or Timber Backer with Surface Patch 100–300 mm Thin paneling or walls requiring stronger backing Plywood or timber backing plate Backing board, matching wall panel, screws, filler, sandpaper 2–4 hours Moderate Support the damaged area from behind, attach a matching patch to the backer, fill the perimeter, sand the repair flush, and refinish the surface. Use compatible materials; excessive moisture can cause wood-based patches to swell.
Plaster Mesh and Base-Coat Repair 50–250 mm Traditional plaster walls Fiberglass or metal lath mesh Plaster bonding agent, mesh, base-coat plaster, finish compound 3–6 hours, excluding curing time Moderate to Advanced Remove loose plaster, secure mesh to a stable edge or backing, apply a base coat in layers, allow proper curing, then apply and smooth the finish coat. Plaster repairs require compatible coats; rapid drying can lead to shrinkage or cracking.
Large Drywall Section Replacement Over 300 mm or damage across several studs Drywall and gypsum board Existing studs or added framing support Replacement drywall, screws, joint tape, joint compound, primer, paint 4–8 hours, excluding drying time Advanced Locate framing, cut back to sound material, add support where necessary, install the replacement section, reinforce seams, finish in thin layers, and repaint. Do not proceed without inspection if the damage involves mold, leaks, structural movement, or hidden utilities.
Small Foam-Filled Cavity with Surface Filler Irregular cavities up to 75 mm Drywall and some interior panel systems Foam provides internal volume; a surface patch may still be needed Low-expansion gap filler, mesh or patch, joint compound, sandpaper 1–3 hours, excluding curing time Moderate Remove debris, apply low-expansion filler sparingly, let it cure, trim it flush, cover the face with mesh or a patch, then apply compound and paint. Do not use high-expansion foam; pressure can distort drywall and create a raised repair.
Corner or Edge Reinforcement Repair Damaged wall corners and edges up to 100 mm Drywall and plaster corners Corner bead or reinforcing mesh Replacement corner bead, fasteners, joint compound, sanding tools 2–4 hours, excluding drying time Moderate Remove the damaged section, align and fasten the new reinforcement, apply compound in widening coats, sand carefully, prime, and paint. Accurate alignment is essential; uneven corners remain visible after painting.

Sand, Prime, and Paint the Repaired Surface

A clean wall repair begins with controlled sanding, not aggressive scraping. Remove loose paper, dust, and raised edges around the hole. For drywall, press the patch firmly, apply thin joint compound, and let each layer dry completely. Thick filler often shrinks and leaves a visible dip.

The National Association of Realtors’ 2022 Remodeling Impact Report estimated 107% cost recovery for interior painting. That figure supports careful surface preparation, even for small repairs. Sand the dried compound with fine-grit paper until the surface feels level under your fingertips. Use a damp cloth afterward. Dust can weaken primer adhesion.

Apply primer over the repair and slightly beyond its edges. Primer seals porous compound and reduces uneven paint absorption. The U.S. Environmental Protection Agency advises extra caution around older painted surfaces, especially in homes built before 1978, because lead-based coatings may exist. Avoid dry sanding those surfaces without proper guidance.

Paint in thin coats. Feather the roller or brush beyond the primed area, then keep the pressure light. Match the wall’s original texture before the final coat dries. My first repair looked smooth but flashed under afternoon light. I had sanded too little at the edges. A second primer coat helped, though the finish still revealed a faint ridge. That small imperfection is useful feedback: lighting, texture, and patience matter as much as filler.

2026 Top Ways to Fix Wall Holes Without Professional Help

Typical DIY hands-on time by drywall hole size, including sanding, priming, and painting the repaired surface.

Small nail holes usually need lightweight joint compound, while larger openings require a patch or backing material before compound is applied. The estimates represent active work time; drying time between coats is additional and varies with product thickness, temperature, and humidity.

FAQS

How should I assess a wall hole before repairing it?

Measure its width, depth, location, and cause with a ruler. A small nail hole needs lightweight filler. Larger holes may need backing or a patch.

How can I tell whether the wall is drywall or plaster?

Drywall usually feels lighter and has a hollow core. Plaster feels harder and may crumble around damaged edges. The distinction affects your repair method.

What warning signs mean I should stop repairing?

Stop if you notice moisture stains, soft areas, mold-like odors, or fresh cracks. Check for hidden plumbing and electrical cables. Turn off power near outlets. Safety comes first.

What materials are useful for a wall-hole repair?

Prepare a utility knife, measuring tape, putty knife, sanding sponge, cloth, primer, and matching paint. Larger damage may require mesh, backing, or a patch. Keep the tools nearby.

How should I prepare the damaged area?

Protect the floor with a drop cloth and move nearby furniture. Cut away loose paper and crumbly material. Create firm edges, but do not enlarge the opening unnecessarily.

How do I apply repair compound properly?

Apply several thin layers instead of one thick coat. Let every layer dry fully. Keep the repair slightly raised, then smooth it carefully. Thick filler can shrink.

How should I sand and prime the repair?

Sand gently with fine-grit paper until the surface feels level. Wipe away dust with a slightly damp cloth. Apply primer over the repair and slightly beyond its edges.

How can I make the painted repair blend into the wall?

Match the surrounding texture before the final coat dries. Use thin paint coats and feather the edges lightly. Check the wall under side lighting. Small ridges can remain visible.

What common mistakes should I reconsider?

Rushing can leave a raised patch or visible dip. Removing too much material creates extra work. I once sanded too little near the edges. The repair looked fine until afternoon light exposed it.

Conclusion

This guide explains how to fix wall holes without professional help by matching the repair method to the hole’s size, depth, and location. It begins with inspecting the damaged area, removing loose material, and preparing a clean, stable surface. After gathering basic supplies such as filler, a putty knife, sandpaper, primer, and matching paint, you can repair small nail and screw holes with a simple filling and smoothing process.

For medium and large holes, the guide covers adding proper wall support before applying repair material in layers. Once the patch has dried, careful sanding helps create a level surface that blends with the surrounding wall. The final steps—priming and painting—seal the repair and restore a consistent appearance. With patience, careful preparation, and attention to detail, many common wall holes can be repaired neatly and confidently at home.

Madeline

Madeline

Madeline is a dedicated marketing professional with a wealth of expertise in our company's core offerings. With a keen understanding of the industry, she brings a unique perspective to her role, consistently delivering high-quality content that highlights the superior aspects of our products. As......